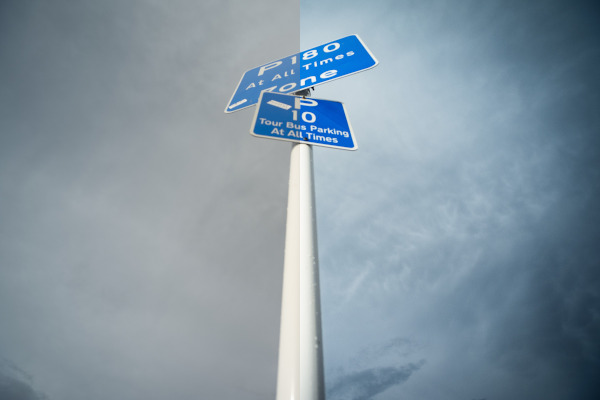
My Workflow for Editing Photos - Utilizing The Power of Adobe Lightroom for Mobile
Introduction
Some time ago, my wife and I had been quite stubborn in sticking to SOOC (Straight Out of the Camera) when taking photographs because we wanted the photos be as natural as possible and to depend on how we expose the photo. But, rotating and cropping were completely fine for us as colors are not manipulated.
Side Note: I had just thought that this might be one of the factors that led me to buying a Fujifilm because of their color science. If you haven’t read my post on how I decided my first camera, click here to view it.
As I create images for my site and build a portfolio of my photos, I noticed that my photos look very normal even if I like the composition. I felt like there was something missing especially when comparing with beautiful photos that can be found in social media. Also, there were many times when photos coming from my smartphone look better than my camera’s.

The frustration I felt piqued my interest in exploring post-processing as a way to enhance my photos and squeeze more beauty out of them. But, getting started with post-processing did not become as smooth as expected. Head down to know about my learnings on how to color grade my photos.
Problem
I initially found Raw Therapee for editing the raw photos of my Fujifilm X-A10. It is a free cross-platform software which is actively being developed. I tried importing the raw .raf files of my camera but I saw a very flat image which is very far from the SOOC image. Unfortunately, I learned that the software has no support with the camera used at that time. As far as I remember, I chose a different camera profile instead, to have some starting point.
Update: Based from the repository of Raw Therapee, the Fujifilm X-A10 is already supported as of v5.5. Click here to view the ticket.
Apart from the hiccup of the initial import, I was overwhelmed with the user interface. There were too many input controls and tabs. For an individual who is considered as a beginner, I highly recommend starting out with tutorials first because of various terminologies which can be too technical. I immediately jumped ship and searched for an alternative software that is easier for me to use.
Note: The problem is not the tool but my incompetency and lack of knowledge. With my current knowledge, I think I am now eligible to use Raw Therapee and maybe I will create a post on this one in the future.
Solution
After trying out different free software, I liked the user experience of the Adobe Lightroom CC application for iOS. The user interface is much more basic and easier to understand, in my opinion. The support for albums and folders is very clean. The controls are collapsed by default and are arranged from top to bottom like how you will edit a photo (i.e. framing -> exposure -> color -> effects).
Starting out with Lightroom was also not that smooth because the free version only supports the DNG (Digital Negative) file format. I needed to convert the raw .raf files to .dng format. Luckily, Adobe provides a free converter software, named Adobe DNG Converter, for this additional step.
These are the software I chose for practicing and improving my photo editing skills. I would like to share the workflow I came up with for streamlining some of the steps requiring human intervention. See my workflow steps below.
Bonus: Photo Editing Workflow
-
Transfer the images from your camera to a PC / Mac.
Tip #1: Aside from using a fast SD card, it is also great to use a fast and reliable card reader.
-
Open the Adobe DNG Converter software and process the raw files to
.dng. -
Transfer back the converted
.dngfiles to your device with Lightroom for mobile.Tip #2: In case you are using a NAS (Network-Attached Storage) at home, you may also use the free Documents application in iOS because of its support to different kinds of protocol like Samba.
-
Open the Lightroom Mobile application and import the
.dngfiles desired. -
Start editing and unleash your creativity.
-
Export the edited version of the photo to your desired channel.
Tip #3: Lightroom for mobile supports sharing of the edited version to specific applications like Instagram or directly share it via AirDrop which is very very handy.

Conclusion
My workflow is not the best and not the most efficient. The need for transferring images from camera to PC / Mac can be cumbersome instead of just directly transferring to your mobile phone. Batch editing is not possible in Lightroom for mobile because you can only paste presets to one image at a time. Well, at least it can export multiple images.
The features of the free version of Lightroom for mobile are already sufficient especially for beginners like me. I believe that its features are powerful enough to extract more details out, pop some more colors, and modify the mood of the image. I have no plans of altering my workflow nor subscribing to the paid Lightroom version, currently.
Color grading your images can greatly boost the overall beauty of the photos. But, it is also possible to ruin the image when overdoing some things. Try applying a bit of everything to grasp how each setting affects your photo. Lastly, always make sure that you are taking raw photos aside from jpg for easier manipulation while retaining the great quality of your images.
Hope you like my post! Feel free to comment / suggest some workflow tweaks and other software suggestions. Cheers!

Leave a comment