
DIY Dry Box: Affordable Way of Storing Your Camera Gears Safely
Introduction
Have you already read my post before on how I chose my first camera? I acquired more and more gears as time passed for supplementing my learning and curiosity about photography. I bought different prime lenses from wide 12mm for landscapes to fast 55mm for portraits.
Even if you normally buy affordable equipments, you will be quite surprised on the total amount you’ve spent for all your gears. That is why it is very important to protect and preserve them. I decided to assemble my own dry box for my camera storage at home.
Dry Box
What Is It
“A dry box is a storage container in which the interior is kept at a low level of humidity. It may be as simple as an airtight and watertight enclosure, or it may use active means to remove water vapor from the air trapped inside.” ~ Wikipedia [Accessed October 2018]
Why Use One
Have you seen photos taken by a camera or lens with fungus? The effect is quite distracting, right? By controlling the humidity, you can prevent fungus build up. Based from EPA, the ideal relative humidity is between 30% to 50% for fungus prevention.
As camera owners, maintaining items in tip-top condition is very important to not waste your hard-earned money.
How to Build
Putting together the items below is very simple and straightforward. The challenge is more on the procurement of the items with the desired specifications.
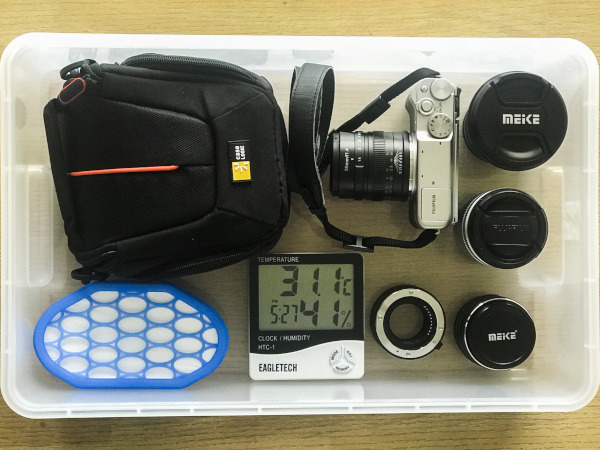
Items Needed
- Airtight Container
- You need to find the right container size according to your current and future gear plans.
- I chose a container with a bigger surface area while having a shorter height. It is easier for me to retrieve a specific equipment.
- You can buy these containers at your local supermarket or department stores.
- Dehumidifier / Desiccant
- You can visit your local hardware stores or Japanese thrift stores for dehumidifiers.
- You will need to replace these once saturated with water.
- Hygrometer
- May find and use a digital or analog hygrometer for this scenario.
- Japanese thrift stores usually sell hygrometers but during my search, the item is not available. I just opted to buy the item online.
Conclusion
The dry box I assembled has been able to fulfill my protection needs for almost a year. I usually open the airtight container a bit if the relative humidity drops quite low as I want to maintain it around 40%. Hopefully, this setup could protect my gears for many years to come.
Let me know if you are also using this manual setup or if you already switched to an electronic dry box. Cheers!
Leave a comment